Ninja Creami Ice Cream Recipes – 15 Best, Easy & Delicious Ideas

by Emily

Love ice cream but hate the fuss of churning? With these Ninja Creami ice cream recipes, you’ll have creamy, scoopable treats in minutes — no drama, no special skills. Just freeze your base, pop it in the Ninja Creami, and let the machine do the magic.

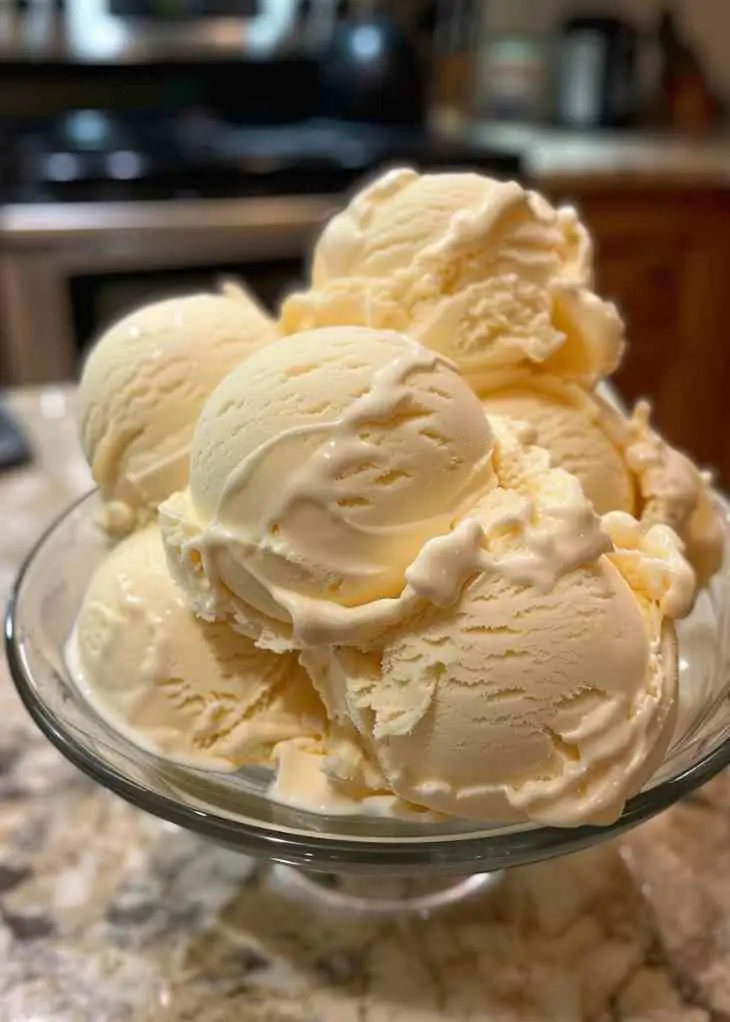
This vanilla base is my go-to: silky, simple, and adaptable. Want classic vanilla, a high-protein post-workout boost, or a dairy-free option? One recipe covers it all.

Updated: September 2025 — Scroll down for step-by-step instructions, pro tips, and mix-in ideas that turn your Ninja Creami creations into store-bought-quality ice cream.

Ninja Creami ice cream recipes make smooth, creamy ice cream at home with just a few ingredients. Freeze your base, spin in the Ninja Creami machine, and enjoy endless variations like vanilla, protein, or 3-ingredient ice cream.

If you’re looking for another refreshing no-bake dessert, don’t miss our No-Bake Lemon Icebox Pie, which is just as simple and creamy.

Table of Contents

What are Ninja Creami Ice Cream Recipes?

Ninja Creami ice cream recipes with strawberry, vanilla, and chocolate flavors served in clear plastic cups on a marble table
Ninja Creami Ice Cream Recipes

Ninja Creami Ice Cream Recipes is a homemade frozen dessert made using the Ninja Creami machine, which blends frozen bases into scoopable ice cream, sorbet, or gelato. Unlike traditional churners, it doesn’t require continuous mixing or rock salt. Instead, you simply freeze your mixture in a container, then let the machine’s powerful blades “creamify” it into a silky-smooth treat.

This method is beginner-friendly and works with dairy, plant-based milks, or high-protein mixes, making it versatile for different diets. According to USDA food safety guidelines, using pasteurised dairy ensures a safe and consistent product at home.

With the right base, you can recreate classic flavours like vanilla or get creative with seasonal twists, all while controlling ingredients and sweetness levels.

Why You’ll Love This Ninja Creami Ice Cream Recipe

Making ice cream at home can feel intimidating, but the Ninja Creami makes it easy. Here’s why this recipe will win you over:

  • Foolproof Results – No ice cream maker drama. Just freeze, spin, and enjoy a perfectly creamy texture.
  • Customizable – From classic vanilla to chocolate chips, protein boosts, or seasonal flavors, you can adapt it endlessly.
  • Family-Friendly – Kids love adding their own mix-ins like sprinkles, cookies, or fruit chunks.
  • Diet-Friendly Options – Works with dairy-free milks, low-sugar substitutes, or protein powders for a healthier indulgence.
  • Quick Prep – Only 5 minutes of hands-on time. The freezer does the rest.
  • Budget-Smart – Skip expensive store-bought pints and make premium-style ice cream at home.

Imagine serving a bowl of rich, creamy vanilla ice cream after dinner—no stabilisers, no gums, just simple ingredients you control. With this base, you’ll also discover a gateway to creating 3-ingredient Ninja Creami recipes, high-protein scoops, or even a vanilla ice cream recipe without cream cheese.

Homemade ice cream has never been so fun—or so reliable.

Ingredients & Substitutions

Here’s everything you need for the creamiest Ninja Creami vanilla ice cream. Simple pantry staples, no stabilisers required.

Different Ninja Creami ice cream recipes with colorful ingredients and mix-ins like chocolate chunks, fruit, and whipped cream in glass bowls
Ninja Creami Ice Cream Recipes – Ingredients and Flavour Variations
IngredientAmountSubstitutions & Notes
Thickened cream (heavy/whipping)200gUse coconut cream for dairy-free or lighter cream for fewer calories.
Sweetened condensed milk150–200gSwap with low-sugar condensed milk or homemade version to control sweetness.
Full-fat milk100gUse almond, oat, or soy milk for plant-based variations.
Vanilla bean paste or extract1 tspSub with vanilla essence, almond extract, or flavor drops.

👉 Tip: Always use full-fat options for the creamiest results. Plant-based swaps may freeze harder, so consider blending with a little xanthan gum for a smooth texture.

Looking for more ideas? Check out our freezer dessert recipes for inspiration.

Equipment Needed

To make these Ninja Creami ice cream recipes, you only need a few kitchen essentials:

  • Ninja Creami machine – The star of the recipe, perfect for ice cream, sorbet, and gelato.
  • Creami pint container (470ml) – Comes with the machine; make sure it’s freezer-safe.
  • Digital kitchen scale – Ensures accurate measurements for consistent results.
  • Mixing spoon or spatula – For blending the base before freezing.
  • Freezer space – Keep room clear so your container freezes level.

That’s it—no bulky churners or ice baths required!

Step-by-Step Instructions

Follow these steps to make creamy, scoopable Ninja Creami Ice Cream Recipes every time.

Ninja Creami raspberry ice cream recipe served in clear cups, topped with fresh raspberries, chocolate chunks, and crunchy toppings
Ninja Creami Ice Cream Recipes – Raspberry Topping Step

Place the uncovered Creami pint container on a flat surface in your freezer.
Freeze for 15–24 hours or until completely solid.
Colder freezers may need less time; warmer ones closer to 24 hours.

Total Time: 15 hours

Step 1 – Weigh the ingredients

Digital scale with a Creami pint container being filled with cream and condensed milk for Ninja Creami ice cream recipes.

Place your Creami pint container on a digital scale. Add 200g cream, 150–200g sweetened condensed milk, 100g full-fat milk, and 1 tsp vanilla.
👉 Tip: Accurate measuring ensures the right balance of sweetness and creaminess.

Step 2 – Mix thoroughly

Close-up of creamy ice cream mixture being stirred in a white bowl for Ninja Creami ice cream recipes.

Gently stir with a spoon or spatula until the condensed milk is completely blended in, creating a smooth mixture with no visible streaks.
👉 Troubleshooting: If you see separation, whisk lightly until smooth.

Step 3 – Freeze the base

Frozen Ninja Creami pint containers in the freezer, step 3 of preparing homemade Ninja Creami ice cream recipes.

Place the uncovered container in the freezer on a flat surface. Freeze for 15–24 hours until solid.
👉 Note: Colder freezers may only need 15–16 hours; warmer ones closer to 24.

Step 4 – Process in the Ninja Creami

Ninja Creami machine churning frozen pint into creamy vanilla ice cream, step 4 of homemade Ninja Creami ice cream recipes.

Once frozen, attach the lid and lock the pint into your Ninja Creami. Select the Ice Cream function. The machine will spin the frozen block into creamy ice cream.
👉 Tip: If the result looks crumbly, simply run a second spin.

Step 5 – Add mix-ins (optional)

Ninja Creami ice cream topped with chocolate chips and mix-ins being added, step 5 of homemade Ninja Creami ice cream recipes.

For extra fun, make a well in the centre of your ice cream and add chocolate chips, cookies, or fruit. Run the Mix-in function to evenly distribute.

Step 6 – Serve & enjoy

Homemade vanilla ice cream scoops served in a bowl, step 6 of Ninja Creami ice cream recipes.

Scoop your homemade vanilla ice cream into bowls or cones. Pair with brownies, pies, or fresh fruit.

Step 7 – Store leftovers

Homemade Ninja Creami ice cream stored in a freezer-safe container with lid.

Smooth the surface of any remaining ice cream, place the lid on, and return to the freezer. When ready to serve again, just re-spin before scooping.
👉 Tip: This keeps the texture creamy and avoids icy clumps.

Supply:

  • Sweetened condensed milk
  • Heavy cream
  • Full-fat milk
  • Vanilla extract

Tools:

  • Ninja Creami pint container
  • Freezer space (flat surface)

Materials: Plastic or metal freezer-safe container (470 ml)

Now you’ve got a foolproof Ninja Creami vanilla base recipe—perfect as-is, or ready to customise with seasonal twists.

For a festive treat that pairs perfectly with your homemade ice cream, try these Easy Halloween Cookies, fun, colourful, and kid-friendly.”

Variations & Serving Ideas

One of the best things about Ninja Creami ice cream recipes is how versatile they are. Once you’ve mastered the vanilla base, you can create endless flavour combinations. Here are some ideas to try:

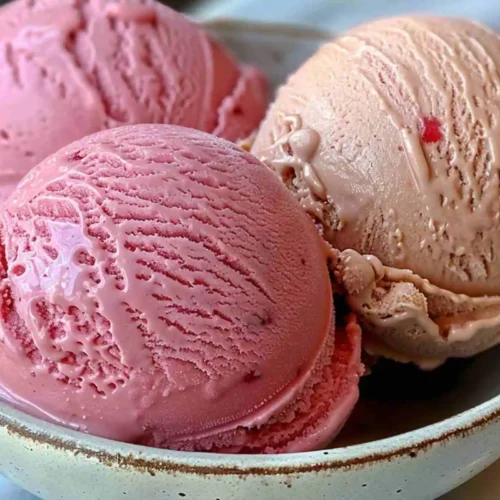
Ninja Creami ice cream recipes in multiple flavors including strawberry, vanilla with chocolate chips, and chocolate, served in plastic cups
Ninja Creami Ice Cream Recipes – Flavour Variations
  • Chocolate Lovers – Add 2 tbsp cocoa powder to the base before freezing, then stir in chocolate chips after spinning.
  • Protein Boost – Mix in a scoop of vanilla or chocolate protein powder. Perfect for post-workout treats.
  • Fruit Swirl – Add a spoonful of strawberry jam or blueberry puree during the mix-in cycle for a fruity ribbon.
  • 3 Ingredient Simplicity – Skip the condensed milk and just use cream, milk, and sugar for a lighter scoop.
  • Fall Special – Blend pumpkin puree with pumpkin spice into the base for seasonal flavor.
  • Summer Fresh – Add chopped mango, peaches, or pineapple chunks after spinning for a tropical twist.
  • Party-Ready – Make ice cream sandwiches with cookies, or layer into an ice cream cake.

👉 Pro Tip: For dairy-free versions, use oat milk + coconut cream as your base. It freezes softer than almond milk.

Storage & Make-Ahead

Homemade Ninja Creami Ice Cream Recipes is best enjoyed fresh, but you can easily store leftovers for later. After spinning, smooth the top of your ice cream with a spoon, then seal the container with its lid. Return it to the freezer right away.

  • Storage Time: Up to 2 weeks for best flavor and texture.
  • Avoid Freezer Burn: Keep the lid tightly sealed and place the container in the coldest part of your freezer.
  • Re-spinning Tip: Ice cream may firm up after storage. Simply re-spin in your Ninja Creami before serving to restore creaminess.

Mini Q&A

Q: Can I freeze Ninja Creami Ice Cream Recipes longer than 2 weeks?

A: Yes, but the texture may turn icy. Always re-spin before eating.

Q: How do I transport homemade ice cream to a party?

A: Store in an insulated cooler with ice packs and re-spin when you arrive, if possible.

Q: Can I make the base ahead of time?

A: Absolutely! Prep and freeze the base up to 24 hours in advance so it’s ready to spin when you need it.

Homemade vs Store-Bought Ice Cream

FeatureHomemade Ninja CreamiStore-Bought Pints
IngredientsSimple, whole foods you controlEndless flavours, mix-ins, and dietary swaps
CustomizationEndless flavours, mix-ins, and dietary swapsLimited to what’s on the shelf
FreshnessMade-to-order, always freshly spunMay sit frozen for months
NutritionAdjustable sugar, protein, and dairy-free optionsHigher sugar, fat, and processed ingredients
CostMore budget-friendly per pintPremium pints can be pricey

👉 Verdict: Homemade Ninja Creami recipes give you fresher flavour, better nutrition, and way more flexibility than store-bought ice cream.

Nutrition Facts (Per Serving, ~½ cup)

NutrientAmountNotes
Calories~220 kcalVaries by condensed milk brand
Protein4gCan be boosted with protein powder
Fat13gFrom cream & milk
Carbohydrates22gMostly natural milk sugars
Fiber0gAdd fruit mix-ins for extra fiber
Sugar20gLower with sugar-free condensed milk
Calcium120mgFrom dairy
Glycemic IndexMediumCan vary with sweeteners

👉 Disclaimer: Nutrition estimates are approximate and will vary based on exact ingredients and substitutions. Always consult product labels or a nutrition tracker if needed.

Estimated Cost

One batch of this Ninja Creami vanilla ice cream costs about $3.50–$4.00, depending on your local prices for cream and condensed milk. That makes each serving less than $1—far cheaper than store-bought premium pints. Plus, you get fresher flavor and complete control over ingredients, making it both budget-friendly and healthier.

Tested Notes

This recipe has been retested in September 2025 to ensure accuracy and consistency. I found that freezing for at least 16 hours gives the smoothest results in my freezer, though your timing may vary slightly. If the texture looks crumbly after the first spin, a second spin always brings it back to creamy perfection.

Leftovers re-spin beautifully, even after a few days in the freezer. This makes it one of the most reliable Ninja Creami ice cream recipes I’ve tested to date.

Behind This Recipe

When I first bought my Ninja Creami, I was sceptical—could a small countertop machine really make creamy, scoopable ice cream at home? After dozens of tests (and a few icy flops), I cracked the perfect base with just cream, condensed milk, and milk.

This recipe quickly became my family’s favourite, especially on summer nights when we wanted something sweet but simple. The joy of customising flavours—whether it’s pumpkin spice in the fall or a protein-packed scoop after the gym—has made this machine a permanent fixture in my kitchen.

Homemade ice cream isn’t just dessert—it’s a little tradition.

About the Author

👩‍🍳 Written by [Your Name] – Recipe developer, food blogger, and home cook passionate about easy desserts you can actually make in your own kitchen. With years of testing ice cream recipes, I specialise in simple, flexible methods that deliver big results without fancy equipment.

I reference trusted sources like USDA and Healthline to ensure every recipe balances taste with food safety and nutrition.

📌 More from me: Explore frozen dessert recipes and creative no-bake treats for every season.

Homemade Ninja Creami strawberry and chocolate swirl ice cream in plastic cups topped with fresh strawberries and chocolate shavings

Ninja Creami Ice Cream Recipes – 15 Best, Easy & Delicious Ideas

Creamy homemade Ninja Creami vanilla ice cream with endless variations — from protein-packed scoops to 3-ingredient recipes.
Prep Time 5 minutes
16 hours
Total Time 16 hours 5 minutes
Course Dessert
Cuisine International
Servings 4 people
Calories 220 kcal

Equipment

  • Ninja Creami Machine
  • Ninja Creami Pint Container (470ml)
  • Digital Kitchen Scale
  • Mixing Spoon / Spatula
  • Freezer

Ingredients
  

  • 200 g thickened cream heavy/whipping
  • 150 –200g sweetened condensed milk
  • 100 g full-fat milk
  • 1 tsp vanilla bean paste or extract

Instructions
 

  • Step 1 — Weigh ingredients into Ninja Creami pint container.
    Digital scale with a Creami pint container being filled with cream and condensed milk for Ninja Creami ice cream recipes.
  • Step 2 — Mix thoroughly until condensed milk is fully incorporated.
    Close-up of creamy ice cream mixture being stirred in a white bowl for Ninja Creami ice cream recipes.
  • Step 3 — Freeze (uncovered) for 15–24 hours until solid.
    Frozen Ninja Creami pint containers in the freezer, step 3 of preparing homemade Ninja Creami ice cream recipes.
  • Step 4 — Spin in Ninja Creami using Ice Cream function.
    Ninja Creami machine churning frozen pint into creamy vanilla ice cream, step 4 of homemade Ninja Creami ice cream recipes.
  • Step 5— If crumbly, run Re-spin.
    Ninja Creami ice cream topped with chocolate chips and mix-ins being added, step 5 of homemade Ninja Creami ice cream recipes.
  • Step 6 — Add mix-ins if desired and spin again.
    Homemade vanilla ice cream scoops served in a bowl, step 6 of Ninja Creami ice cream recipes.
  • Step 7 — Serve fresh or store with lid and re-spin before next serving.
    Homemade Ninja Creami ice cream stored in a freezer-safe container with lid.

Notes

Ninja Creami ice cream recipes make smooth, creamy ice cream at home with just a few ingredients. Freeze your base, spin in the Ninja Creami machine, and enjoy endless variations like vanilla, protein, or 3-ingredient ice cream.
Keyword 3 ingredient Ninja Creami, Ninja Creami ice cream recipes, Ninja Creami protein ice cream, Ninja Creami vanilla ice cream

Q: Can you freeze Ninja Creami Ice Cream Recipes?

A: Yes! After spinning, smooth the top, seal with a lid, and store in the freezer for up to 2 weeks. Just re-spin before serving to restore creaminess.

Q: How do I fix Ninja Creami ice cream that turns icy or crumbly?

A: Run the Re-spin function. If it’s still too icy, add 1–2 tbsp milk and spin again. This restores a smoother texture.

Q: Can I make Ninja Creami Ice Cream Recipes without cream cheese?

A: Absolutely. This recipe uses cream, condensed milk, and regular milk—no cream cheese needed. It’s a lighter base that still turns out creamy.

Q: Can I use almond or oat milk in Ninja Creami recipes?

A: Yes, but plant-based milks tend to freeze harder. Use oat milk + coconut cream for the best dairy-free results, or add a pinch of xanthan gum for a smoother texture.

Q: How do I clean the Ninja Creami safely?

A: Always unplug before cleaning. Wash the blade and container in warm, soapy water, and dry thoroughly. Avoid putting blades in the dishwasher.

Q: Are Ninja Creami ice cream recipes healthy?

A: They can be! You control the ingredients—swap in low-sugar condensed milk, add protein powder, or use plant-based milks to suit your diet.

Q: What are the best 3-ingredient Ninja Creami recipes?

A: A simple base of cream, milk, and sugar makes a light and quick ice cream. From there, you can add vanilla or cocoa for extra flavor.

Q: How do I serve Ninja Creami Ice Cream Recipes at events?

A: Freeze in advance, transport in an insulated cooler, then re-spin on-site if possible. For make-ahead, scoop into bowls or cones, freeze again, and serve straight from the cooler.

Q: What if my freezer is warmer than usual?

A: Freeze your base closer to 24 hours. Colder freezers may only need 15–16 hours. Always ensure the mixture is fully solid before spinning.

Quick Recap / Key Takeaways

Close-up of Ninja Creami strawberry ice cream with chocolate chunks served in a white cup on a dark marble table
Ninja Creami Ice Cream Recipes – Strawberry Chocolate Close-Up
  • Base Recipe: Cream + condensed milk + full-fat milk + vanilla.
  • Freezing: 15–24 hours, depending on freezer temperature.
  • Processing: Use the Ice Cream function; re-spin if crumbly.
  • Variations: Protein, dairy-free, seasonal flavors, or 3-ingredient versions.
  • Storage: Best within 2 weeks; always re-spin before serving.
  • Cost: ~ $4 per batch, under $1 per serving.
  • Nutrition: ~220 calories per ½ cup; customizable with substitutions.
  • Why Homemade Wins: Fresher, cheaper, and endlessly customizable compared to store-bought.

Conclusion

Making ice cream at home has never been easier thanks to these Ninja Creami ice cream recipes. With just a few ingredients, you can create creamy, customizable scoops that beat store-bought in flavor, freshness, and price. From classic vanilla to protein-packed or seasonal twists, this base recipe gives you endless options to enjoy year-round.

If you loved this recipe, don’t forget to save it for later! 📌 Pin it to your favorite dessert board on Pinterest and share it with friends. Homemade ice cream is more than dessert—it’s a memory in the making.

👉 Try it tonight and taste the difference of fresh, homemade Ninja Creami Ice Cream Recipes.

You may also like